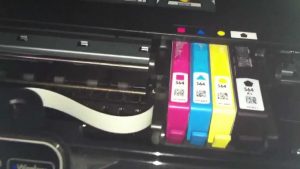
Jam Error Code HP Printer 8500
HP 8500 printer jam error is described as, when you start printing any document and the printer suddenly stops supplying the paper for printing purpose and an error message is displayed on the printer screen saying “HP Printer OfficeJet Pro 8500: Paper Jam error”. At times, this paper jam message can be fake while there is no paper jam in the printer.
To prevent this HP Printer Error you should always ensure that the tray is not overloaded and the adjustment of the width adjuster is done according to the paper size. Also ensure that the quality of paper you are using is good as poor quality of paper can lead in damaging the printer.
Causes Paper Jam Error Message HP Printer 8500
Causes of HP 8500 printer jam error
- This paper jam can occur due to the following reasons
- If the paper is not kept properly in the paper tray.
- The paper used for printing is of different quality that is not recommended to use.
- The paper roller used is full of dirt or are damaged.
- The back access door of the printer is locked in an improper manner.
- Wrinkled or torn paper is supplied in the printer.
- Overloading of paper in the printer tray.
- Torn paper locked in the area that is not easily accessible.
- The edges of the paper are bent.
Troubleshooting Steps HP Printer 8500 Error Paper Jam
Troubleshooting
Clean the paper jam
- First of all separate the loose paper from the output and input tray. If you remove the jammed paper at this stage then the print mechanism can be damaged as clearing the paper jam from the front side is a bad idea.
- Clean the paper jam from the rear end of the printer, to do this follow the given instructions:
- Turn off the printer by pressing the Power button.
- Then detach the power source from printers rear end.
- Next, from the wall outlet detach the power cable.
- After that you can access the rear side of the printer
- Further you need to remove duplexer by pushing the button in the inward direction.
- Once you detach the duplexer from the printer then gradually separate the jammed paper from the rollers of the printer.
- Now by pressing the latch on the duplexer, detach it’s cover and clear the paper that is locked inside.
- Once you are done with the cleaning and removing of paper reassemble the printer and attach to the power source to switch on the printer.
Print a self-test report
This is one of the methods that will assure you that your hardware is working properly or not. To print a self test report, follow the steps given below:
- Stack some paper that is unused, in the input tray.
- Then turn on the printer by pressing the Power button.
- Next you need to press the Setup button.
- After that select the print report by pressing the right arrow button and the press the OK button.
- Again, select the Self-Test Report by pressing the Right Arrow button and then press the OK button the report will get printed. If these reports get successfully printed then it means the issue does not persists now.
Clear the paper jam from paper Tray 1 and 2
- First of all remove the entire stack of paper from the output tray.
- Then switch off the printer, remove the power cords and lift the output tray.
- Next pull the paper gently and try to remove it carefully as removing it from front can lead to damage in the print mechanism.
- Do the same for the paper tray 2 and remove the paper.
- Further reconnect the printer and turn it on.
Check carriage path and reseat the printheads
Inspect the compartment 1 and 2
- Firstly turn off your printer and detach the power supply cord.
- Then inspect the carriage by opening the access door.
- If you find the carriage on the right side of the printer then follow the given steps if not then attach the carriage door and turn on the printer and after that detach the power cable from wall outlet and again open the access door.
- Now inspect the compartments 1 and 2 and if you find any jammed paper remove it carefully.
- Make sure no paper bit is left inside and close the access door.
- Next reassemble the printer and connect the power source to turn it on.
- Similarly you need to inspect the compartment 3.
Reset the printheads and inspect the carriage
Check for the rollers if they are damaged – if damaged, replace them otherwise clean them with a clean piece of cloth.
After doing this you need to print a self test report and see the issue is gone or still persists if yes then you need to reset your printer.
Scope of Services:
- Just a call away from our Printer Technical Support team
- Remote access facility and cloud facility
- Quick Response to queries
- Provide easiest and best possible solution
- Available 24*7 at your service Dial

- Best cooperation and customer satisfaction