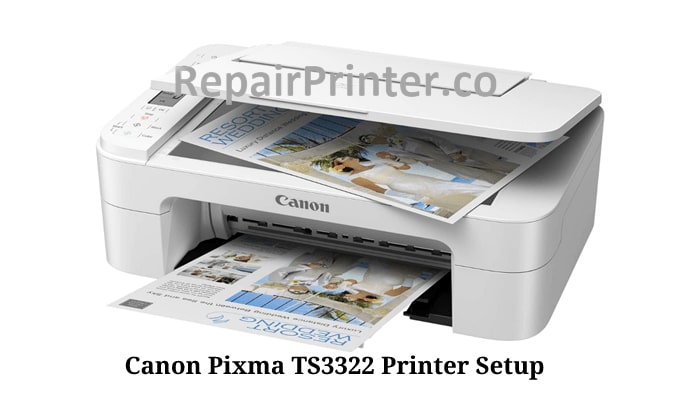
Canon TS3322 Wireless Setup
The following article is about “how to start wireless setup on the PIXMA TS3322 and guides you with instructions for completing Easy Wireless Connect and then further steps for how to wireless connect & use it with Android, iOS, Mac, or Windows.
Printer Setup : Initiating Easy Wireless Connect – TS3322
The very first step before you get your printer connected with any of the Android, iOS, Mac, or Windows devices is to initiate the Easy Wireless Connect on the printer.
Follow the below procedure to start the Easy Wireless Connect.
- There is a Direct Button on the computer. Press and hold that button. You will see the Direct icon light flashing.
Note: The Direct icon should flash once you press and hold the Direct button
- Make sure the Network status icon and the horizontal bars flash. When this happens your printer is in Easy Wireless Connect mode.
Now you can use your Windows or Mac OS, or an Android or iOS mobile device to send the network information to the printer through a wireless connection between your printer and wireless network.
To use your printer wirelessly with a Chromebook, you must first connect it wirelessly using one of the techniques listed above. The printer can then be associated with the Chromebook after its network connection has been established.
Learn More about : How To Fix Canon Pixma Printer MG5320 Error Code B200
Windows Setup: Wireless Connect for PIXMA TS3322
To be able to use the PIXMA TS 3322 printer to print or scan wirelessly on a Windows computer, the printer must first be connected to the wireless network. The computer’s drivers and applications must then be installed. When using the Easy wireless connect technique to connect to the wireless network, the setup programme steps are shown below.
The setup process consists of two parts:
- Step 1 is the printer setup by initiating Easy wireless connect.
- Step 2 is to get the setup file and install the drivers & software.
- Start Easy wireless connect on the printer.
Start the Easy wireless connect process on the printer before starting the setup on the PC. After that, finish the configuration on the PC. Then complete the setup on the System you are using. (See the procedure above to start the Easy Wireless Connect.)
Once you have already initiated Easy wireless connect on your printer, please proceed to the Download and run the setup file instructions below.
- Download and run the setup file.
- Get the Setup File Here
- Run the setup file & Tap Start Setup.
- Read the network security notice & click Next.
- Read the license agreement. Select Yes to continue.
- Select Agree to the information request. Then A window will appear.
- Select Yes to confirm the connection method.
- Screens may show depending on your network configuration. Make sure to choose a 2.4GHz SSID (network) from the selection list. If you’re unsure, consult the documentation for your router. Enter the password in the next screen after selecting the SSID.
- Once the connection is established, Enter Next.
Note: If your printer isn’t being identified, you may need to disable any security software temporarily, or if you don’t want to, you may need to open up ports that the printer utilizes for network communication. Please consult your security software’s handbook for instructions on how to open these ports.
You can check for Canon website CSR to see your technical support choices in case your product issue was not fixed even after completing the instructions above, or if you require extra assistance.
Mac Setup: Wireless Connect for PIXMA TS3322
Using the Easy Wireless Connect technique, connect your PIXMA TS3322 printer to a Mac.
To print or scan wirelessly on a Mac computer with the PIXMA TS3322 printer, the printer must first be connected to the wireless network and software, drivers, and programs loaded on the computer. When using the Easy Wireless Connect technique to connect to the wireless network, the setup software steps are shown below.
The setup process has two steps:
Again the first step is to start Easy Wireless Connect on the printer, and then download and run the setup file.
- Download and run the setup file.
- Get the Setup File Here
In the Dock, Click The Setup icon & follow the instructions:
1. A screen will appear stating “Starting to install the helper tool” click Next on it.
2. When you click Next you will get a pop-up screen asking for your password for the Admin computer. Enter the network password and then press the Install helper button on it.
3. A “Start Setup” window will appear with a Start setup button. Click the button.
4. A window with the heading “Before you continue with some warnings will appear with the Next button. Click Next on it.
5. Then the Licence Agreement window pops up, click agree/yes.
6. A disclaimer window for the cannon-related product info will appear, click Agree or do not agree.
7. If you click do not agree, another window pops up with an ok button, just click the Ok.
8. Another screen with the heading “Check the connection method” Pops up, check if the window states your router and the connection method as wireless, and then press Yes.
9. Message window stating – Setup wants to access key “MyNetwork” in your keychain, click Allow on it.
10. Screens may show depending on your network configuration. Make sure to choose a 2.4GHz SSID (network) from the selection list. If you’re unsure, consult the documentation for your router. Enter the password in the next screen after selecting the SSID.
11. Now the connection is established, Enter Next.
Wireless Setup On Ios Device
Learn here how to use the Canon PRINT Inkjet / SELPHY app on an iOS device to set up a printer on a wireless LAN connection.
Canon PRINT Inkjet / SELPHY is a free app that lets you print from your iPad, iPhone, or iPod touch with a selection of PIXMA, MAXIFY, and SELPHY printers.
This application allows you to connect a wireless printer to your network without using any cables. Follow the steps below to use this configuration.
- Get the Canon PRINT Inkjet / SELPHY app Downloaded from the Apple Store.
- Set your printer to cableless setup mode, also known as Easy Wireless Connect, if you haven’t previously. Before you start the app, make sure Easy Wireless Connect is running.
- Open the Canon PRINT Inkjet / SELPHY app on your mobile device.
- An Extended Survey notice shows when you initially access the app. After reading the information, tap Agree or Disagree. Regardless of the choice you choose, you will be able to use the app.
- If you’re asked if you want to give this app access to your location, select Allow While Using App.
- In the next pop-up box, tap Search.
- “Print would want to identify and connect to devices on your local network,” states a notice. Please press the OK button.
- The printer will begin looking for information. The option If Printer Cannot Be Found will appear after a few moments. Select “Printer not found”.
- Connect your smartphone to your printer directly now.
- You’ll be prompted to connect to the printer’s Wi-Fi network. Tap Join when requested.
- A network list appears. Select your network by tapping on its name.
- If your printer is too far away from your router, your device may attempt to connect directly to the printer. Turn off the printer and move it closer to your router if this happens. Then, starting with step 3, repeat the process.
- If your network requires a password, type it in and then hit OK. You can use the Show password box to see the password as you type it in or after you finish typing it.
- “Settings information has been sent” appears on the screen after a few moments. Select OK.
- The screen “Register Printer” appears. Make a tap on your printer in the screen. The software will gather information about your printer.
- If you’re printing from the app for the first time, you may be asked to grant access to your photos. Select OK.
- You can print photographs from your smartphone, import images from Canon Camera Connect, or use cloud services to print images.
USB Setup : Connecting PIXMA TS3322
- Using a USB cable, connect the printer to the computer.
- Now is the time to turn on your printer.
- Wait for your system to recognize the printer and install it.
- Additionally, install the printer software.
- If you don’t have access to the disc, you can download the drivers from the manufacturer’s website.
- To install the driver, double-click the downloaded file. Your printer is now ready to print, scan, or fax documents.
FAQ’S
Q: Why isn’t my Canon printer not printing?
A: It could be a glitch. Reset your printer to factory settings. To do so, simply turn your printer off, unplug it for a few minutes, and then reconnect it. If it doesn’t work, try turning off the printer and computer and then on again. Try reinstalling your Canon printer driver.
Q: Why is my Canon Model printer showing offline?
A: Faulty or outdated printer drivers might also cause the Canon printer to become unusable. Error: The ‘Canon Printer Goes offline Windows 10’ status could be caused by outdated or defective printer drivers. Check and make sure your computer has the relevant printer drivers installed and updated. You have the option of manually or automatically updating it.
Q: How to refill ink in a Canon Pixma Model Printer?
A: Follow the below steps:
1)Ensure that the printer is turned on.
2)Remove the scanning unit/cover from the scanner.
3)Remove the ink tank cover.
4)Remove the tank cap from the ink tank that has to be refilled.
5) Grab a new ink bottle from its packaging.
6)Remove the bottle cap by holding the ink bottle upright and twisting it off.
7)Refill the ink tank with new ink.
8)Close the intake with the ink tank’s tank cap.
9) Gently close the scanning unit/lid.
Q: Is Canon TS 3322 compatible with Chromebook?
A: Yes
Q: Is Canon TS 3322 compatible with Windows 10?
A: Yes
Q: Is Canon TS 3322 compatible with Airprint?
A: Yes
Q: Is Canon TS 3322 compatible with iphone?
A: Yes
Q: Is Canon TS 3322 compatible with Macbook or Macbook Air?
A: Yes. Use an appropriate USB cable to connect your Canon printer to your MacBook. Install the printer’s Mac software, and double-check that it has a printer setup assistant.
Q: Can Canon TS 3322 print pictures?
A: Yes
Q: Can Canon TS 3322 print wirelessly?
A: Yes
Q: Does Canon TS 3322 have Bluetooth?
A: Yes
Q: How to install Canon TS 3322 without a disc?
A: If you don’t have the disk, go to the manufacturer’s website and download the drivers.
Q: Can I scan with Canon TS 3322?
A: Yes
Other Issues And Errors
 Canon Pixma MX492 Printer Wireless Setup
 How to Do Deep Cleaning on a Canon printer?
 How do I Fix the Alignment on My Canon Printer?
 Canon Pixma TS3122 Wireless Setup
 Canon TS3322 Printer Setup
 Canon Pixma ix6820 Wireless Setup
 Canon Printer MX922 Setup
 Fix Canon Printer Error 5200 on Pixma MP 490 & mx 340 & 350 Canon
 Canon PIXMA MG3620 Wireless Setup
 Fix Canon MX328 Printer Error 6000 Manual
