Installation Fatal Error Code HP Printer
While setting up a brand-new or old HP printer, the consumers frequently receive the ‘Fatal Error.’ It is among one of the most annoying issues, especially when you face it with an all all-new HP Printer. You are just unable to print, scan or copy any file from it. Are you also receiving this error? In this article, we are going to talk about the possible quick fix of HP Printer Fatal Error issue while setting up HP Printer. Fatal Error in Printer setup appears up in the last procedure when the computer system is attempting to connect to the printer. It indicates you have set up the printer partly and the setup got stuck inside computer registry entries plus system data.
Troubleshooting Steps HP Printer Error Installation Fatal
How to Solve printer fatal error during installation?
We are going to explain various ways, so we have divided them into various areas. Execute the actions discussed in each segment one at a time.
Step 1: Un-installation of Printer
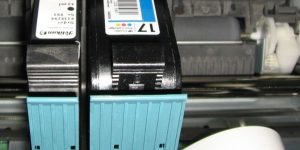
The most important action will undoubtedly be to uninstall all printer software program and also drivers entirely from the computer system. Any remaining stuck entry will positively produce issues in the future while aiming to set up and utilize the printer.
- Shut down off the printer and after that detach it from the computer system.
- In XP, go to Control Panel -> Add/Remove Programs. In Vista/7, go to the Control -> Programs -> Programs and Features.
- Select the Printer software program and uninstall them individually.
Step 2: Eliminate trapped entries
It is the time to get rid of all the stuck entries of HP Printer from Windows registry and system data. You can do this making use of the HP Software program Removal Utility.
Please note: Take assistance of HP specialized assistance when you do not have the sufficient expertise the best ways to carry out the actions stated in this area.
Carry out listed below actions
- Download and Install All-in-One Software Program Removal Utility for Windows XP & 2000.
- Download and Install Officejet Removal Utility for Windows XP, 2000 and also Vista.
- Power off the printer as well as separate it from PC.
- Run any one of the above removal utility and carry out on-screen directions. You need to run this utility four times to accomplish every one of its 4 degrees– L1, L2, L3, and also L4. A system reboot is done after performing the above steps.
Step 3: Applicable Only for XP and Vista
Please do not execute this part for Windows 7.
Just the Windows 7 and also Server 2008 come in preinstalled with the most up to date Windows Installer 5.0. Various other Windows versions– XP, Vista, 2000, as well as 2003 does not come along with the most updated Windows Installer 4.5. Execute listed below process to examine as well as upgrade it.
- Go to the Start and click Run.
- Type msiexec.exe and press the Enter key. It will open up a brand-new window of Windows Installer and reveal its edition.
- If you do not have the most recent Windows Installer 4.5 after that download it.
- Install Windows Installer 4.5 in XP and Vista.
Step 4: Delete Temporary Files
Execute below-mentioned steps to eliminate the stuck temporary files
- Open Windows Temporary Files Folder via temp in Run.
- Click Start Menu and afterward click Run. The Vista or 7 end users could type run in the search box in Start Menu to open it.
- Type %temp% to access the End user’s temporary files.
- Remove all the temporary files from %temp% folder.
- You need to empty C: \ Windows \ temp folder.
Step 5: Download and Install latest drivers
Case 1: For Broadband or higher Internet Connection
- Download the latest Full Package drivers for your Printer.
- Download the drivers in a folder under C: Drive.
- Download the WinRAR, 7z or any other compression utility and install it.
- Use the compression utility to extract the setup file it in a folder under C: Drive.
Case 2: For Slow Internet Connectivity
Copy the available entire HP Printer driver disc in a folder under C: Drive. In case not having the disc, you can order it online.
The driver path in both cases is C:\HPXXXX, where X will be replaced with printer model number.
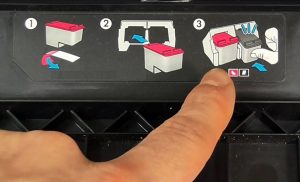
Step 6: Install the printer
- Run the setup from the C: drive.
- Perform steps appear on the screen for installation of the printer.
If you still encounter the ‘Fatal Error’ issue with your HP Printer after that it is highly suggested to receive aid from professionals; please do not hesitate to call us on our Toll-Free Number. We at Printer Support Phone Number, are a pool of Printer Expert are renowned as the outstanding service providers in the Online Assistance community, that function 24×7 for resolving your troubles.
Scope of Services
- The definite solution for every query
- Prompt response
- 24×7 service On Toll Free